Skip to ContentSkip to Footer

Search

Menu

  • Reviews
    Reviews
    • New car reviews
    • Used car reviews
    • Car group tests
    • Long-term tests
    • Road tests
    • All reviews
  • News
    News
    • Consumer news
    • Opinion
    • Awards
    • All news
  • Best cars
    Best cars
    • Best electric cars
    • Best hybrid cars
    • Best plug-in hybrid cars
    • Best SUVs
    • Best small cars
    • Best hatchbacks
    • Best family cars
    • Best 7-seater cars
    • Best first cars
    • Driver Power
    • All best cars
  • Buy a car
    Buy a car
    • Buy A Car
    • New car deals
    • Used car deals
    • Car leasing deals
    • Deal of the Day
  • Sell a car
    Sell a car
    • Sell My Car
    • Free car valuation
    • Car selling guides
    • How to sell your car
  • Used cars
  • New cars
  • Tools & advice
    Tools & advice
    • MoT Checker
    • Car Tax Checker
    • Buying a new car
    • Buying a used car
    • Car insurance
    • Car technology
    • Car care
    • Learning to drive
    • All advice
  • Products
    Products
    • Winter tyres
    • Car wax
    • Faraday bags
    • Jump starter packs
    • Pressure washers
    • Steering wheel locks
    • All products
  • Vans
    Vans
    • All Vans
How can we help you?
Buy a CarSell My Car
Find a car review
Make
  • Abarth
  • Aion
  • Alfa Romeo
  • Alpina
  • Alpine
  • Ascari
  • Aston Martin
  • Audi
  • B-ON
  • Bentley
  • BMW
  • Bristol
  • Bugatti
  • BYD
  • Cadillac
  • Caterham
  • Changan
  • Chery
  • Chevrolet
  • Chrysler
  • Citroen
  • Corvette
  • Cupra
  • Dacia
  • Daihatsu
  • Denza
  • DFSK
  • Dodge
  • DS
  • Farizon
  • Ferrari
  • Fiat
  • Fisker
  • Ford
  • Geely
  • Genesis
  • Great Wall
  • Honda
  • Hyundai
  • Ineos
  • Infiniti
  • Invicta
  • Isuzu
  • Iveco
  • Jaecoo
  • Jaguar
  • Jeep
  • KGM
  • Kia
  • Koenigsegg
  • Lamborghini
  • Land Rover
  • LDV
  • Leapmotor
  • Lepas
  • LEVC
  • Lexus
  • Lotus
  • Lucid
  • Lynk & Co
  • MAN
  • Marcos
  • Maserati
  • Maxus
  • Maybach
  • Mazda
  • McLaren
  • Mercedes
  • MG
  • MINI
  • Mitsubishi
  • Mobilize
  • Morgan
  • Nio
  • Nissan
  • Noble
  • Omoda
  • Ora
  • Perodua
  • Peugeot
  • Pininfarina
  • Polaris
  • Polestar
  • Porsche
  • Proton
  • Renault
  • Rimac
  • Rivian
  • Rolls-Royce
  • Saab
  • SEAT
  • Skoda
  • Skywell
  • Smart
  • SsangYong
  • Subaru
  • Suzuki
  • Tesla
  • Toyota
  • Vauxhall
  • Volkswagen
  • Volvo
  • Westfield
  • Xiaomi
  • Xpeng
  • Zeekr
Model
Skip advert
Advertisement
Features
  • Home
  • Land Rover
  • Defender

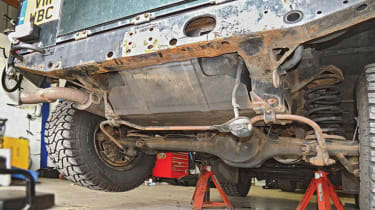
How to replace a Defender rear crossmember - pictures

By:Auto Express team
27 Sep 2017
Go to: How to replace a Defender rear crossmember
  • Step 1

    <span>Rear-mounted fuel tank has to be removed, so run tank low before starting work, then drain or pump fuel out (see this month’s Product Test).</span>

  • Step 2

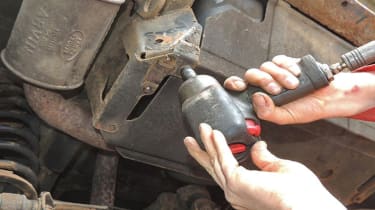
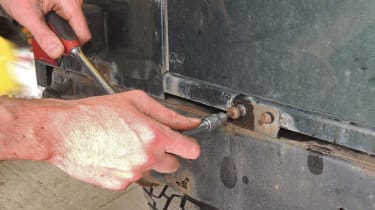
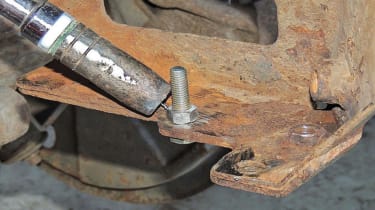
    <span>Bolts holding the fuel tank’s support plate to the chassis leg brackets are removed. But they are well rusted to their captive nuts and several shear off.</span>

  • Skip advert
    Advertisement - Gallery continues below
  • Step 3

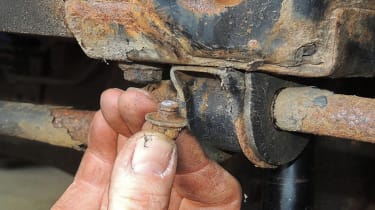
    <span>Similarly, some of the anti-roll bar mounts have seized bolts. It’s quicker to let them shear off and renew them, and their captive nuts, later.</span>

  • Step 4

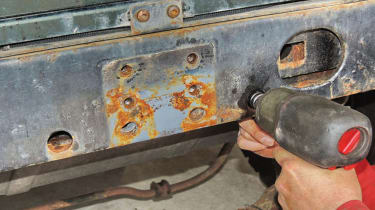
    <span>Two of the fuel tank support plate bolts are accessed through holes in the crossmember. Again, threads and bolt heads are corroded badly…</span>

  • Skip advert
    Advertisement - Gallery continues below
  • Step 5

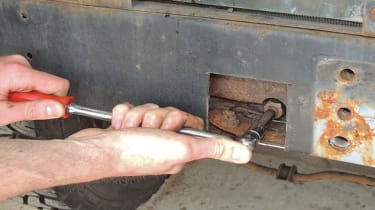
    <span>..meaning the correct socket won’t fit. James, IRB’s fabricator, used a special tapered socket after cutting part of the scrap crossmember away for access.</span>

  • Step 6

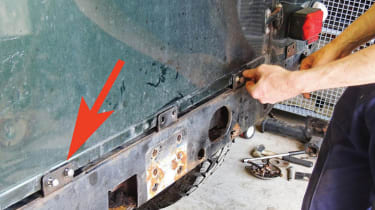
    <span>The screws holding the body to the crossmember need a prior soak with releasing fluid. Some have captive nuts; those at the ends have free nuts.</span>

  • Skip advert
    Advertisement - Gallery continues below
  • Step 7

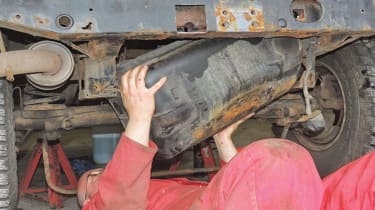
    <span>After disconnecting the fuel pipes, cables, and lifting the support plate away, the fuel tank can be worked free from its mounting frame.</span>

  • Step 8

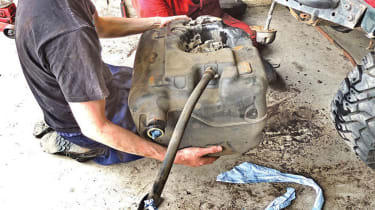
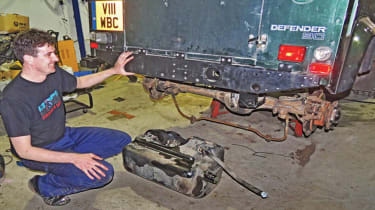
    <span>Once the tank is out, carefully plug the pipe connections to prevent fuel spillage and store the tank safely, well away from grinding and welding.</span>

  • Skip advert
    Advertisement - Gallery continues below
  • step 9

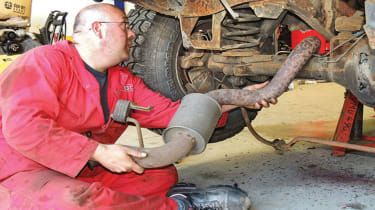
    <span>James, who was carrying out the welding for Ian, decided that removing the rear section from the exhaust would significantly improve access.</span>

  • Step 10

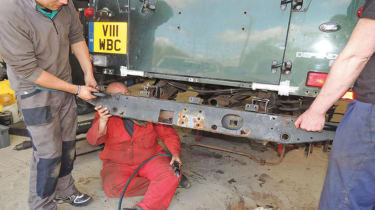
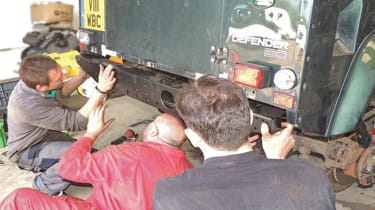
    <span>Body mounting bolts, removed earlier, were temporarily refitted to these two brackets to support the crossmember before cutting it free.</span>

  • Skip advert
    Advertisement - Gallery continues below
  • Step 11

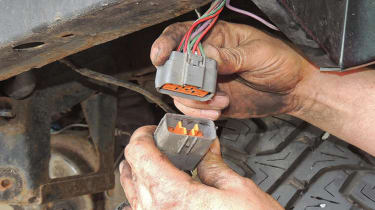
    <span>Disconnect the wiring loom, cut where necessary and pull through with length of wire attached, so you can pull the loom back through when finished.</span>

  • Step 12

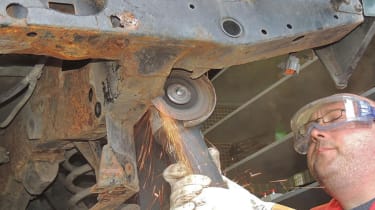
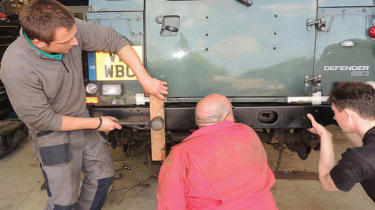
    <span>The new crossmember’s leg length is measured and marked on the chassis. Initial cut leaves extra material, to be trimmed back more accurately later.</span>

  • Skip advert
    Advertisement - Gallery continues below
  • Step 13

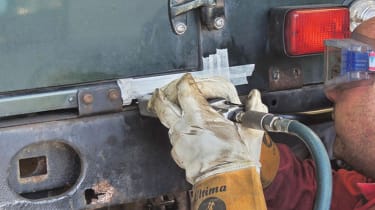
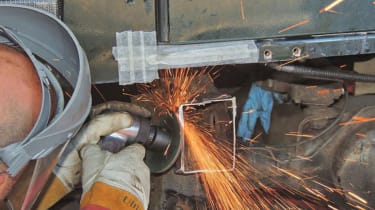
    <span>This crossmember was also attached to the chassis at each upper side. James used a power saw, protecting the paintwork with masking tape.</span>

  • Step 14

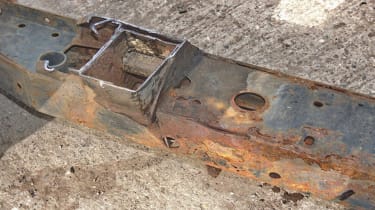
    <span>It looks as if the crossmember simply lifted away but it didn’t! There will almost inevitably be small areas of steel still attached. You have to patiently…</span>

  • Skip advert
    Advertisement - Gallery continues below
  • Step 15

    <span>…locate them while working the crossmember up and down when loose, to identify the culprits before cutting through and removing the crossmember.</span>

  • Step 16

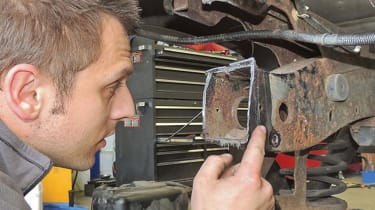
    <span>It’s essential to cut back to sound steel. Ian checked the condition of the metal near the cuts before the repair section was offered up as a trial fit.</span>

  • Skip advert
    Advertisement - Gallery continues below
  • Step 17

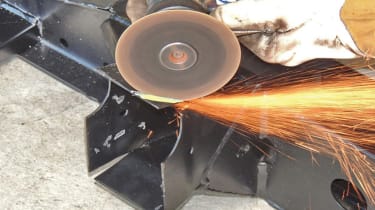
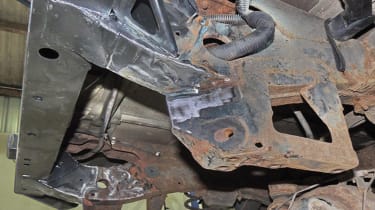
    <span>The cut edges are trimmed, and the chassis area where the new section will fit is cleaned up with the grinder to produce a rust-free surface for welding.</span>

  • Step 18

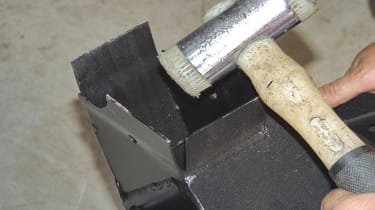
    <span>The stubs on this repair section had the same dimensions as the original chassis rail, so were tapped outwards enabling it to slide over the chassis.</span>

  • Skip advert
    Advertisement - Gallery continues below
  • Step 19

    <span>It can be tricky to line things up correctly to start with, but it’s important not to panic and to check carefully and methodically as you proceed.</span>

  • Step 20

    <span>It’s okay to tap the crossmember into position using a hammer, but use a protective piece of wood placed right across the height to avoid dents.</span>

  • Skip advert
    Advertisement - Gallery continues below
  • Step 21

    <span>Part of making the crossmember fit accurately might involve removing small areas of metal. That’s fine provided you leave enough meat in the sandwich.</span>

  • Step 22

    <span>You’ll need to look for clues to line up the crossmember accurately. This chassis hole (left) conveniently matched one on the repair section (right).</span>

  • Skip advert
    Advertisement - Gallery continues below
  • Step 23

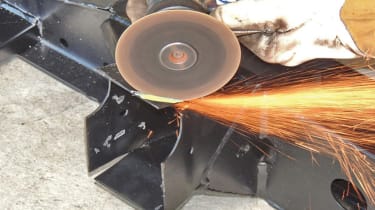
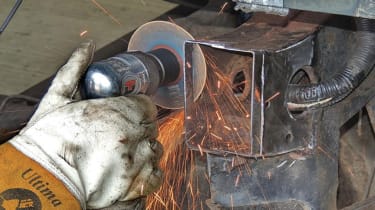
    <span>The joint area can now be marked out accurately with the new crossmember offered in place. Then use the cutting disc to remove the surplus.</span>

  • Step 24

    <span>At this stage, where bolts sheared during dismantling, the captive nuts were ground off and new nuts (temporarily held with a bolt) were welded in place.</span>

  • Skip advert
    Advertisement - Gallery continues below
  • Step 25

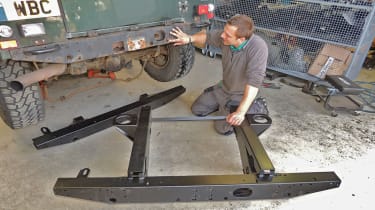
    <span>Finally, after painstakingly ensuring a correct fit – Ian was satisfied that the new IRB crossmember could be located perfectly in position for welding.</span>

  • Step 26

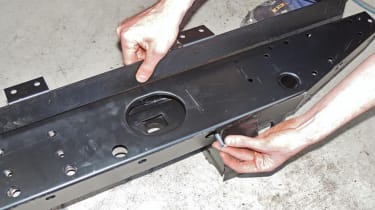
    <span>The bracket assembly for attaching the crossmember to the body is bolted on separately to provide adjustment, allowing for typical bodywork variations.</span>

  • Skip advert
    Advertisement - Gallery continues below
  • Step 27

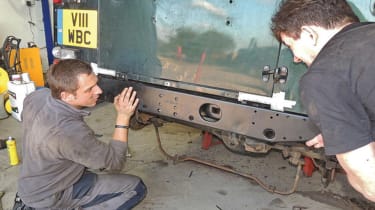
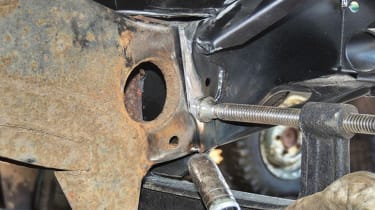
    <span>Spend as long as needed, after fitting to the body, in correctly aligning the repair section. Clamp in place, apply a couple of spot welds, then check again.</span>

  • Step 28

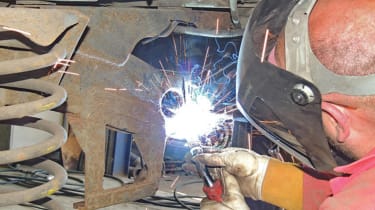
    <span>ames temporarily tack-welded the joint at one side, then the other, continually checking alignments. Tacks can be ground off for readjustment if needed.</span>

  • Skip advert
    Advertisement - Gallery continues below
  • Step 29

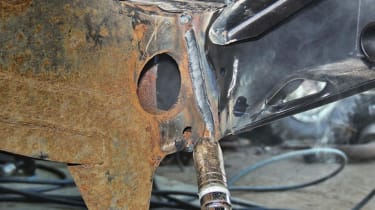
    <div> When the new section was securely held by tack welds and correctly aligned, James made complete, unbroken strong welds all the way around the joints. </div>

  • Step 30

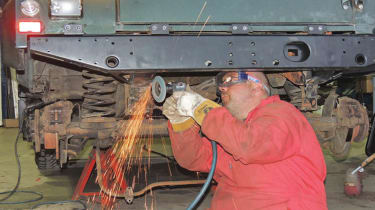
    <span>James used a soft pad on the grinder to clean off any weld spatter and any high spots – it can be tricky welding in such an awkward location.</span>

  • Skip advert
    Advertisement - Gallery continues below
  • Step 31

    <span>With welding complete, the finished job is a treat to behold. New steel welded skilfully to good, clean original steel has produced a strong and long-lasting job.</span>

  • Step 32

    <span>Owner Phil was full of admiration for the structural improvement to his Defender, and was ready to hitch up his trailer loaded with racing rowing boats.</span>

  • Skip advert
    Advertisement - Gallery continues below
  • How to replace a Defender read crossmember -1

Recommended

Best large SUVs to buy 2026
Best large SUVs - July 2026 header image

Best large SUVs to buy 2026

Large SUVs are big on comfort, practicality and versatility. Here’s our pick of the best on sale now
Best cars & vans
14 Jul 2026
New Land Rover Defender facelift brings styling changes and butch new Vertex variant
Land Rover Defender Vertex - front

New Land Rover Defender facelift brings styling changes and butch new Vertex variant

The perennial British off-roader has been tweaked for its 2027 model year
News
7 Jul 2026
Land Rover Defender Octa loses 93bhp, but it’s not all bad news
Land Rover Defender Octa MY27 - front

Land Rover Defender Octa loses 93bhp, but it’s not all bad news

New emissions regulations have hit the top-spec Land Rover Defender Octa
News
7 Jul 2026
Four new Land Rover Defender Classic V8s with wild colour-changing paint go to one customer
Classic Land Rover Defender V8 range

Four new Land Rover Defender Classic V8s with wild colour-changing paint go to one customer

You’re not likely to see these special Land Rover Defenders doing work around the farm anytime soon
News
23 Jun 2026

Most Popular

Dacia Duster and Bigster hybrids get a hefty price cut
Dacia Duster - cornering

Dacia Duster and Bigster hybrids get a hefty price cut

The Dacia Duster and Bigster hybrid models now start from £23,345 and £26,715 respectively
News
4 Aug 2026
New Volkswagen ID.3 Neo 2026 review: EV puts VW back where it belongs
New Volkswagen ID.3 Neo - front tracking

New Volkswagen ID.3 Neo 2026 review: EV puts VW back where it belongs

Has VW’s all-electric hatchback finally grown up? We get behind the wheel to find out
Road tests
4 Aug 2026
Long-term test: Renault 4 E-Tech Iconic+
Renault 4 - charging fleetwatch

Long-term test: Renault 4 E-Tech Iconic+

Second fleetwatch report: living without a home charger means regular public charging, but the R4 is proving it isn’t as inconvenient as expected
Long-term tests
5 Aug 2026
Skip to HeaderSkip to Content
  • Contact Us
  • About Us
  • Valuations
  • Carbuyer
  • DrivingElectric
  • evo
  • Privacy Policy
  • Cookie Policy
  • Terms and conditions
  • Fake Reviews Policy
  • Privacy Preferences
Follow us on FacebookFollow us on TwitterFollow us on YouTubeFollow us on InstagramAdd as a preferred source on Google

Our marketing claims explained. Average savings are calculated daily based on the best dealer prices on Auto Express vs manufacturer RRP.

Please contact the dealer for a personalised quote, including terms and conditions. Quote is subject to dealer requirements, including status and availability. Illustrations are based on personal contract hire, 9 month upfront fee, 48 month term, 8000 miles annually, inc VAT, excluding fees. Vehicle returned at term end.

Auto Express "Find A Car" is managed by Carwow Ltd. Auto Express "Find A Car" is a trading style of Carwow Studio Limited, which is an Introducer Appointed Representative of Carwow Ltd, which is authorised and regulated by the Financial Conduct Authority for credit broking and insurance distribution activities (firm reference number 767155). Carwow Ltd may introduce you to Carwow Leasey Limited (trading as Carwow Leasey). Carwow Leasey Limited is an appointed representative of ITC Compliance Limited which is authorised and regulated by the Financial Conduct Authority for credit broking (firm reference number: 313486). Carwow Ltd and Carwow Leasey Limited are each credit brokers and not lenders. Carwow Ltd and Carwow Leasey Limited may receive a fee from retailers advertising finance and may receive a commission from partners (including dealers) for introducing customers. All finance offers and monthly payments shown are subject to application and status. If you’re unhappy with Auto Express or Carwow’s service, you may be able to contact the Financial Ombudsman (please see www.financial-ombudsman.org.uk for more information). Carwow Ltd (company no. 7103079), Carwow Leasey Limited (company no. 13601174) and Carwow Studio Ltd (company no. 13018565) are limited companies registered in England with their registered offices at Verde Building, 10 Bressenden Place, Victoria, London, SW1E 5DH. Carwow Studio Limited and Carwow Leasey Limited are wholly owned subsidiaries of Carwow Ltd.

Copyright Carwow Studio Limited 2026. All rights reserved. Auto Express™ is a registered trade mark. Carwow Studio Limited is part of the Carwow Group.

Advertisement