How to investigate TDV6 turbocharger noise - pictures
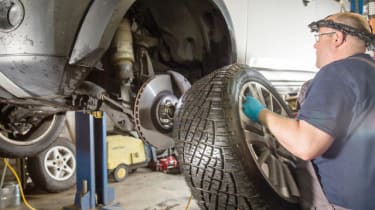
<strong>ACCESSING THE TURBO</strong> <strong>Step 1: </strong>First job is to get the car on the ramps, and remove the nearside front wheel. The turbo is basically at the back of this wheelarch.
<strong>Step 2: </strong>This is the wheelarch area. Unlike previous ladder-chassis era Land Rovers, there’s very little room around any component.
- Skip advertAdvertisement - Gallery continues below
<strong>Step 3: </strong>To improve access, there are three, small heat shields to remove. The fixings may be corroded, though ours came undone with ease.
<strong>Step 4: </strong>As the fixings are removed, apply creativity to slide, rotate or ease out the heat shield. Take care not to damage air or brake pipes.
- Skip advertAdvertisement - Gallery continues below
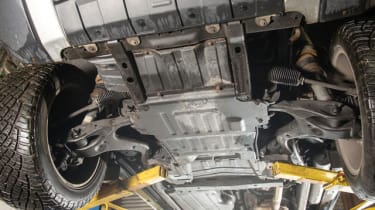
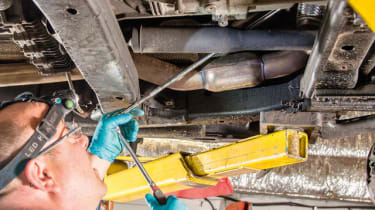
<strong>Step 5: </strong>Next we remove the undertrays. This is the arrangement; three covers on the engine front to back. We’ll remove the middle and rearwards ones.
<strong>Step 6: </strong>The securing bolts screw into captive nuts. They can be corroded, or even rounded off. All but one of ours came off easily.
- Skip advertAdvertisement - Gallery continues below
<strong>Step 7: </strong>One captive nut broke free and was spinning with the bolt, so it was ground off. Be ready for this, as corroded fixings can be common.
<strong>Step 8: </strong>The two undertrays are then removed, exposing the back of the engine and the gearbox. This is a good time to inspect for any fluid leaks.
- Skip advertAdvertisement - Gallery continues below
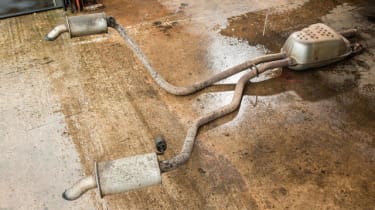
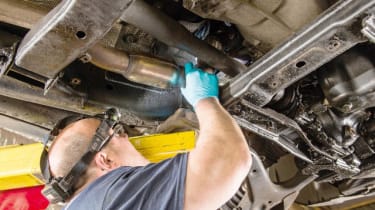
<strong>Step 9: </strong>Next, the rear of the exhaust is removed. Old exhaust fixings can be in very poor condition. You’ll need two people to remove this.
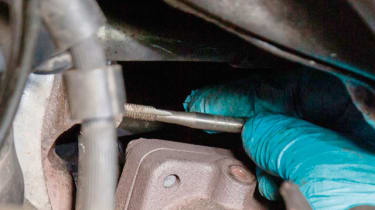
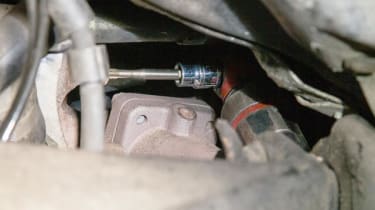
<strong>Step 10: </strong>Next, the exhaust manifold bolts on the rear of the turbo are undone. There are three and they need a very long extension to reach them.
- Skip advertAdvertisement - Gallery continues below
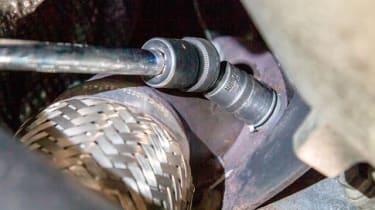
<strong>Step 11: </strong>Whatever you do, don’t round the heads off. Use careful heat if you have difficulty, but hopefully you should find they move okay.

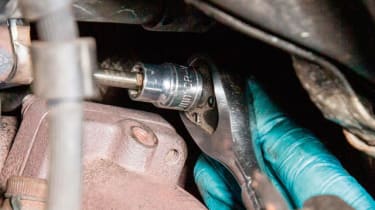
<strong>Step 12: </strong>There’s one final small heat shield to remove. This is all the access you have. Small hands help to get the 8 mm spanner in.
- Skip advertAdvertisement - Gallery continues below
<strong>Step 13: </strong>Restricted access means this heat shield is best removed from the top of the engine bay. We are nearly there.
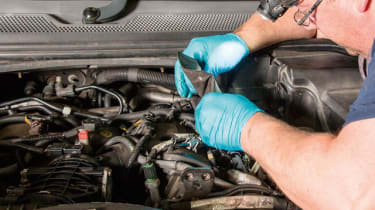
<strong>Step 14:</strong> <span>Finally, James removes the small elbow to the EGR system with its gasket. We’re now ready to check the turbo.</span>
- Skip advertAdvertisement - Gallery continues below
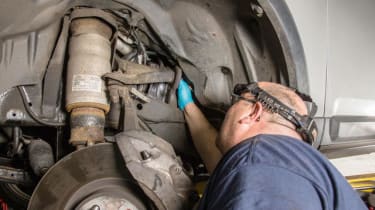
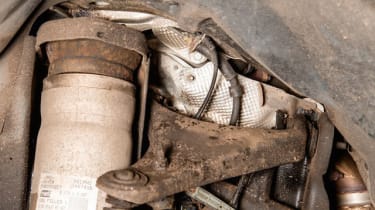
<strong>DIAGNOSE AS YOU GO</strong> <span><strong>Step 1:</strong> <span>From the wheelarch, and underneath, James feels the action of the turbo. Looseness or play in a bearing would cause the initial whistling.</span></span>
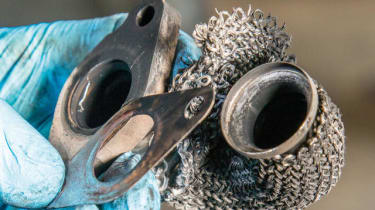
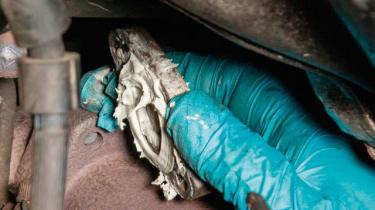
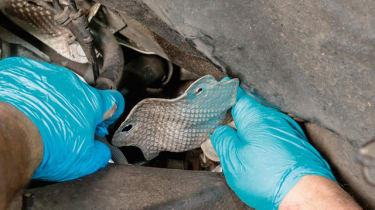
<strong>Step 2:</strong> <span>Confusingly, the turbo feels fine. The problem must be elsewhere, and the sooty deposits on the shield and EGR joint pinpoint the issue.</span>
- Skip advertAdvertisement - Gallery continues below
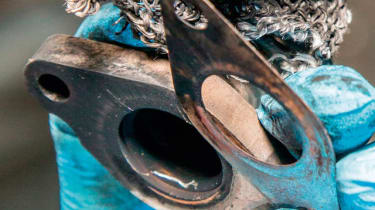
<strong>Step 3:</strong> <span>The soot evidences a leak of exhaust gas from the EGR elbow. That leaking of gas under pressure is the cause of the whistling sound.</span>
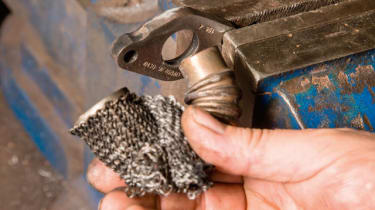
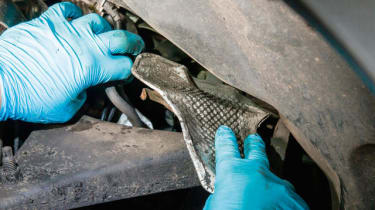
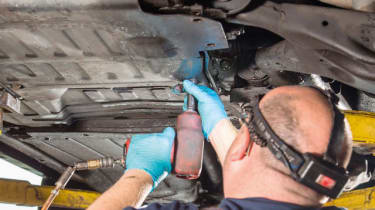
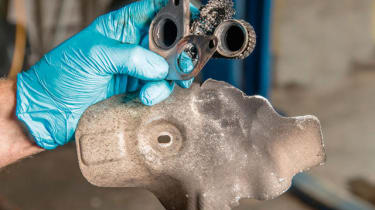
<strong>TO MAKE A BLANKING PLATE > SIMPLE INEXPENSIVE FIX</strong> <strong>Step 1:</strong> James decides to separate the elbow on the EGR pipe from its bolting flange, leaving just the flange with a hole in it.
- Skip advertAdvertisement - Gallery continues below
<span><strong>Step 2:</strong> Next he cleans up the face of the hole, then TIG welds in a filler piece of steel to close the hole, making it into a blanking plate.</span>
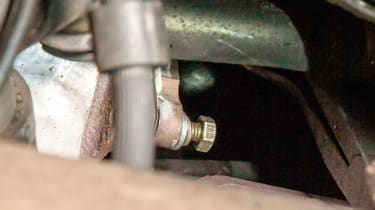
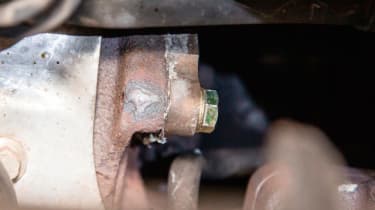
<strong>Step 3:</strong> <span>The plate is tried in position on the vehicle, but one of the flange bolts will screw only half way in. A new bolt is no better.</span>
- Skip advertAdvertisement - Gallery continues below
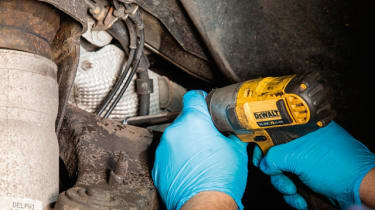
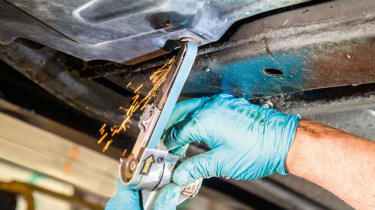
<strong>Step 4:</strong> <span>If this thread strips, the body will probably have to come off to fit a new manifold. James gently tries tapping the thread by hand, very carefully.</span>
<strong>Step 5:</strong> <span>Next he goes a little further, trying an air tool, but the tool can’t quite get to the right angle. To force it would risk ruining the thread.</span>
- Skip advertAdvertisement - Gallery continues below
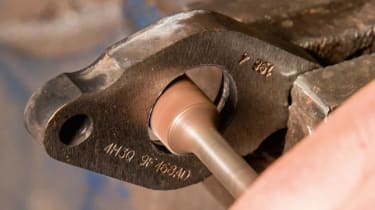
<strong>Step 6:</strong> <span>James then tries a small ratchet, feeling by hand as the tap slowly cuts a thread back into the exhaust manifold, using what little space he has.</span>
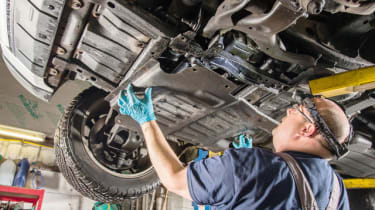
<strong>Step 7:</strong> <span>Once he’s happy, and the bolt travels cleanly through the manifold, the new blanking plate is coated with exhaust paste and offered up.</span>
- Skip advertAdvertisement - Gallery continues below
<strong>Step 8:</strong> <span>Finally, the plate is fitted, and the two new bolts tightened successfully, without damaging the manifold.</span>
<strong>Step 9:</strong> <span>The exhaust assembly is refitted to the existing pipework connections, and suspended on its rubber hangers.</span>
- Skip advertAdvertisement - Gallery continues below
<strong>Step 10:</strong> <span>The three heat shields are slotted back in, and bolted back into position. A road test confirms the whistling is cured.</span>
Most Popular

Citroen is plotting a new 2CV – but the risks are huge

New Kia Sportage breaks cover and it’s sleeker than ever

Best mid-size SUVs to buy 2025 - our expert pick of the top options